12/03/2017

ON7DQ Winter SOTA Tour - 9-12 March 2017

I wanted to do a 4 day tour of the summits in March like last year, with two goals in mind :
- do all summits which are above 500m and grab some winter bonus points

- do at least 10 summits to get the 10 YEARS SOTA in Belgium Award.

For weeks I was watching the weather forecasts, but all predictions said : rain, rain, rain , …
I think I’d rather have the snow of last year, but rain … means the forest tracks would all be muddy !
Nevertheless, I started preparing myself for some “wet” activations, and got the idea to make a special SOTA-UMBRELLA, which also would include a well covered operating table !
Find more details of this contraption here https://on7dq.blogspot.be/2017/03/my-sota-umbrella-table.html 


Now what happens if you prepare for a lot of rain ? It doesn’t rain !

All predictions proved wrong in the end, and I had four days of mostly sunshine and temperatures of up to 15 °C … speaking of easy winter bonus points, hi.

So the man made a plan … for one summit in PA, and 11 in ON.
These are the summits I visited :

09/Mar/2017 PA/PA-002 (Vrouwenheide)
09/Mar/2017 ON/ON-026 (Le Mont d'Henri-Chapelle)
09/Mar/2017 ON/ON-001 (Signal de Botrange)
10/Mar/2017 ON/ON-009 (Iverst)
11/Mar/2017 ON/ON-025 (Burteaumont)
11/Mar/2017 ON/ON-011 (Sur Clair Fa)
11/Mar/2017 ON/ON-013 (Bois de Hodinfosse)
11/Mar/2017 ON/ON-010 (Baraque Fraiture)
11/Mar/2017 ON/ON-018 (A la Plate)
12/Mar/2017 ON/ON-019 (Bois de Javingue)
12/Mar/2017 ON/ON-004 (Bois de Hazeille)
12/Mar/2017 ON/ON-006 (La Croix Scaille)

I made 211 qso’s on this trip, an average of  17.6 qso's / summit.
Total points earned : 82, which brings me to 397 activator points to date.

DAY 1

PA/PA-002 (Vrouwenheide)

On my way to Aachen, where I wanted to do some shopping, I stopped at this PA summit, because it will be taken off the list on July 1st.  I parked at 50.846248, 5.955114, and took the short walk to the grass field on the summit.

There was a very light drizzle, so I did set up my newly invented umbrella and table :


The umbrella was a gift from my Toyota dealership ... how nice of Toyota to make it in the SOTA colours !! hi


On the table, place for the KX3, battery and even the logbook !
Antenna was the link dipole on a 6m fishing pole, my favourite SOTA antenna.


Even the operator gets a nice "sota teint" from the umbrella ...

I started on 40m ssb, but had problems to get myself spotted, my cellphone din’t get a network connection. This problem would bother me several other times on this trip !
So after two ssb qso’s , I switched to CW and got easily spotted via RBN.
Still , the activators were not fully awake yet, I only made 6 more qso’s before leaving the summit.

After my “shopping extravaganza” in Aachen ... it was time to move on … to my first of a series of ON summits.

ON/ON-026 (Le Mont d'Henri-Chapelle)

Easy parking near the picknick table at 50.677059, 5.920479, in the "Rue du Moulin a Vent".
Although you could operate at this table, the view from the bench a bit further is much nicer, so I chose to operate there.

For a quick setup, I chose my endfed wire, length 9.15m + 9:1 UNUN. Mounting this wire on a 10m mast is very easy, and also has the advantage to work on any band from 80m-10m,
just hit the autotuner button and I’m ready.
Disadvantage : from my experience, it doesn’t work as well as a dedicated resonant dipole.
I was able to selfspot, so made all 10 qso’s in ssb there.
And to my surprise , when I quickly tuned to 17m , I worked a station from Guadeloupe, TO3Z. So the vertical works better than I thought !


Some other novelty was my battery : in the red box are 8 Li-Ion cells (from a Dell laptop battery).
4 times 2 cells in parallel gives just over 16V when fully charged. The KX3 only accepts 15V, so I found an "autoswitch voltage reducer" in a QST article ( April 2015, page 39, original idea by AD5X, article also found here  ).

For most of the discharge cycle, the KX3 gets more than 13.8V , and so can operate at maximum power of 15W (80-20m). Nice !


ON/ON-001 (Signal de Botrange)

Last summit before I had to go my B&B address in Raeren, near the German border.
It was getting late, so I set up on the parking lot (pos50.501208, 6.093355) , again using the vertical.
If I don't have to walk very far, I carry a heavy galvanized steel ground anchor, which forms a firm base for the 10m mast. It has a screw form, one condition is of course that you're not on rocky ground.


My cellphone had problems again, but to my surprise .. there was free WiFi on ON/ON-001 !
So I had the chance to look up the spots on Sotawatch and work 4 S2S : ON4KCY/P , M3ZCB/P , M1MAJ/P and MM/SP9MA/P
Made 5 more regular qso’s, and called it a day.


DAY 2

ON/ON-009 (Iverst)

On the second day of my tour I had only planned one activation. The rest of the time I did a tour in the Eifel region and went swimming …
Many hams use the parking lot on the German side of the road, but you can park one car on the Belgian side too, at this position : 50.408333, 6.369756, near an information panel.
Not far from the car, a short walk into the woods, I set up on the Belgian side of the road, again using the vertical. WX was sunny and almost no wind ...


Being early morning, I wanted to try some 80m, to give the ON hams a chance to work this summit.
But that was no big success, apart from hearing Don, G0RQL only briefly, and not good enough for a qso, I had to give up 80m, and made 19 qso’s on 40m, mixing SSB and CW.

And then it happened … the 10m pole I’m using is the 10m GFK Mast "MINI" from http://www.dx-wire.de
I wanted to retract it and suddenly I couldn’t … two elements wouldn’t go back in … what was going wrong ?
As it turned out afterwards, two elements got cracked up and some pieces of fiberglass came loose and blocked the sliding action. After removing the loose pieces I could pack the pole, but couldn’t use it anymore on this tour. What a bummer …
For only 60 Euro, one can not expect exceptional quality , but this is still a disappointment, this pole turns out to be what it is … cheap.

[ added July 2017 : in the meantime I could repair this pole, the two broken pieces were replaced, cost 7€ ]

DAY 3

ON/ON-025 (Burteaumont)

Saturday March 11 was chosen as my busiest day, because it was also the VK/ZL <> EU S2S Event. I set up on this easy drive-up summit to be on the air early, and because not too many visitors were expected there. Parking is here :  50.400523, 5.979388, along the Route du Wavreumont. 
This is a farm/forest road in bad shape, but drive slowly and you'll get there. The actual summit is in private property, but the parking spot is in the AZ.


I did hear one VK station that I think was talking to 2E0YYY, but as I was about to call him and ask to qsy , he went qrt ! So far for VK/ZL … I didn’t hear any other, called cq several times, but no joy … ah, well, I still made 7 qso’s , mainly in CW. 

Here a nice view from the summit :


ON/ON-011 (Sur Clair Fa)

The forest tracks were in good shape, so I drove up a little further than last year, and until the road was blocked by a pile of stones, parking spot is here 50.319992, 5.972432.
To your right is a grass field, when you walk to the highest point of that field (where you see a lookout tower), you're in te AZ and can set up.
If you want to walk to the actual trig point, it's about 30 minutes one way, on a fairly flat summit.
I made 14 qso’s , including 2 S2S.


ON/ON-013 (Bois de Hodinfosse)

This summit involves a  fair bit of walking, so I had calculated some more time for it. I also had my lunch there .. and then started walking. 
(I parked here : 50.309002, 5.845732 , and walked up to here : 50.314285, 5.847994)

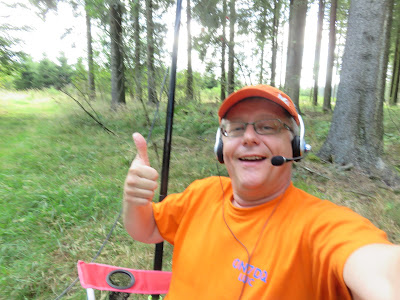
Other novelty .. in Aachen I got myself a selfie-stick, everyone has one , right ?


Later I found out that Dom, M0BLF/P must have been on the summit at the same time, but I didn’t see or hear him, also had no QRM on the frequencies I used (he mainly operates 30m CW, and must have been at another side of the slope …).
Found a nice place in the sun, with an impressive view … and what a difference with last year, when all of this was covered in snow !


Armchair copy on ON/ON-013 ... well, just joking, I didn't make any 2m qso's on this summit, but I thought it was a nice picture, hi.

One would forget that I was there for SOTA … I had some nice DX contacts : K4DY at the early time of 12:06 UTC , and was also happy to log Geert EA8/PA7ZEE !
After logging 17 QSO’s, it was time to move on to ...

ON/ON-010 (Baraque Fraiture)

Super easy summit … drive to the big parking lot (pos 50.253133, 5.731574), , and find yourself a spot in a corner and set up ...


Again good DX from NE4TN and K4MF, and again EA8/PA7ZEE. Made 16 QSO’s, all in CW because my phone gave up again ... sigh.

ON/ON-018 (A la Plate)

EDIT 2022:  This summit is no longer drive up, but still easy to activate with only a short walk.
New parking spot is here : 50.313556, 5.528613 (near the football field).
From there it is an easy 10 minute walk to the summit. The summit marker is hidden between the trees, but makes for a nice operating table if you can find it ;-)
Look out for this shield:


Go into the woods and a bit later you will find this:


If you don't find it, operate along the track, like I did.

Easy drive up, go via the village of Wéris, take the "Rue du Broux", and drive carefully to this position : 50.322808, 5.544940, where you can park. The road is in a very bad state, so take it easy.
You can operate near the car if you wish, the summit is a flat ridge. The trig point is some 650m southwest.

This was my last summit for the day, so was a bit in a hurry … but the chasers seemed to have woken up and have all the time, they kept on calling … so ended my day on this summit with 30 QSO’s !


At 15:15 UTC I left the summit, found a nice restaurant to have dinner, and drove to my next B&B in Nassogne, near the summit I had planned for the next morning.

DAY 4

This Sunday coincided with the UBA Spring contest on 2m. So I took an early breakfast, and went to my first summit as quickly as I could  :

ON/ON-019 (Bois de Javingue)

I followed a tip from Peter, ON4UP, to drive up the road Sur Baulet all the way to the end, but I was a bit too optimistic, and drove past the point where I should take a path to the summit. Anyway I found a nice parking spot at a house in the woods (pos 50.155342, 5.281790) , took all my stuff (backpack, chair and mini table), then had to descend a little and found the path without trouble.
My operating spot was about here : 50.157758, 5.290215, where I had not too many trees blocking my view ... and the VHF signals I hoped ...

This time I used my FT-857D which is mounted in a wooden frame in my backpack, toghether with a Z100 antenna tuner for HF use.
With a special set of batteries (2 Dell laptop batteries in a homebrew frame, putting the batteries in parallel via diodes, giving 14~16V at 9Ah), I can operate 20 to 30 Watts without problems. I even took two extra batteries to make sure I could operate the whole contest. 

Antenna for VHF was the 4-element logperiodic I used last year (see my report from last year elsewhere on this blog), mounted at 2/3 of a 6m fishing pole.


I don’t know if my setup was not working or if the interest in contesting was low … but I made a meager 11 qso’s in 2 hours, none of which was a call from a regular SOTA chaser.

Of course the FT-857D has HF too … so I gave up on the 2m contest and wanted to try some HF …. Oops !
Being in such a hurry … I forgot to pack any HF antenna …. stupid me !
I did qualify the summit, so no problem for me … but sorry to those that would have worked me on HF … better luck next time.

ON/ON-004 (Bois de Hazeille)

This is an easy drive-up summit, with a nice operating spot behind the radar tower.
Park here :50.031536, 5.427229, and operate anywhere along the forest road. DON'T go into the woods as it is forbidden to leave the tracks !
Since this was my 10th ON summit, this was the one that got me the 10 Years ON SOTA Award … mission accomplished !


This was also  the place to test a lightweight antenna, used by many SOTA activators in the USA, the most famous one being Steve the “goatman” WG0AT. It is also the antenna recommended by Wayne N6KR of Elecraft.
The antenna is nothing more than 58 feet of wire, with a counterpoise of 13 feet.
It is connected directly to the rig, on a BNC to binding post adapter, no coax needed !
(some people use a 9:1 unun, which probably gets better results in tuning the antenna)

For us Europeans those lengths are 17.7 m and 3.96m.
I put up the radiator over my fishing pole, midpoint around 5m, and tied the end to a wooden lookout tower. The counterpoise was laid on the ground, KX3 on a small table, 50cm above ground. 
See picture above, I drew a line on it to show you where the wire was.

The KX3 was tuning the antenna, but SWR did not go below 3 on 40m … so I’m not really sure it’s an improvement over my link dipole. Again, like with the random vertical, it’s only advantage would be the multi-band operation, and maybe a little weight saving (no coax).
On the air, I got good reports despite the bad SWR, but that can also have been propagation at that time of day …
17 qso’s were made on 40m, I called cq on 20m but got no replies. Then made one qso on 17m and went on to my last summit for this trip.

ON/ON-006 (La Croix Scaille)

This is again an easy drive-up summit, but also a very busy place in the weekends. Many come to visit the “Tour du Millenaire” (see https://en.wikipedia.org/wiki/Tour_du_Millénaire ), which is a new steel tower, replacing an earlier wooden construction. Acces to the tower is free, and gives you a wonderful panorama. Many families also come for a Sunday afternoon walk in the woods …


I set up on a parking lot a bit further in the woods, driving past the tower, then to the right to pos 49.954181, 4.844514. Don't go left at the end or you'll end up in France.
Although this spot is not so busy as the parking at the tower, I still got more attention than I needed.
Walkers, or people with cars even stopped to ask if “the Martians were coming” or “if I had spoken to E.T. yet” … very funny indeed , hi. Last year a lady saw my headphones and wanted to know if I was listening to the birds hahaha.


The activation went very well,  a nice pile-up netted 51 qso’s on 40m, both ssb and cw.
Now I had carried a Linx 7” tablet for doing some PSK, but nobody really requested that I should use this mode … this was the last chance to give it a try.


So as a last part of my activation, I connected the tablet to my KX3 with my homebrew interface (see https://on7dq.blogspot.be/2017/02/my-kx3-digimode-interface.html) and started calling cq on 14.071 in PSK31. Spotted myself … and then waited, and waited …. and called more cq … and more …

After calling cq for 5 minutes, I finally got called by SV2OXS , thank you Christos for saving my day!
So my system seemed to work, but more cq’s didn’t bring any more qso’s, I gave up and packed up for the last time at 16:30 UTC and took the road home to Ostend, where I arrived at 19:30 UTC.

So far for this trip … thanks to all chasers for the qso’s !
Hope to do it again next year !

73 de Luc – ON7DQ

10/02/2017

My KX3 Digimode Interface


This is a short description of what I built for using digimodes on my Elecraft KX3.
It's not a final building project, there is no PCB ... you're invited to experiment yourself with what works for you, but I may give you some ideas to get you started.

My main purpose was to use this for SOTA activations in digimodes (mainly PSK31 and RTTY).
Of course you can operate PSK on the KX3 by reading received text on the 8 character decoder in the VFO B area, and sending back your reply with the CW paddle.
I did try that on one activation, but I can assure you, it is not the most flexible way of operating, so there had to be a better way. 

It all started with reading on the SOTA reflector about a cheap Linx 7" tablet running a full Windows 8 install, and it seemed to have a 4-pin audio connector, so audio IN and OUT.
Those were two things my good old Nexus 7 (2012 edition) lacked : running Windows programs like  FLDIGI, and audio input.
So I got me one of those tablets for 99€ in a local electronics supermarket, where it was sold under the brand name Lamina.
In the meantime you can get them much cheaper, and probably with better specs (more memory, faster CPU etc), but it seems they only have an 8" and a 10" version on the market now.
See http://linxtablets.com/

Now I needed an interface !

I based my interface loosely on this circuit :


Since the KX3 can use VOX in the DATA A mode , I didn't need a PTT circuit, just two transformers, some resistors and capacitors and that should be it.
I finally ended up with this much simpler circuit :


The transformers are 1:1 , the type you find in old computer modem boards.
Right angle 4-pin connectors were difficult to find locally, so I just ordered some ready made shielded cables from Ebay, and cut those in two. The straight connector is used at the tablet, the right angle one is for the MIC input on the KX3. Also the Phone connector has a right angle connector, but with only 3 pins.

The connection convention for most tablets and phones is this :
(Google TRRS for more info)

TIP            : LEFT audio out
RING 1     : RIGHT audio out
RING 2     : GND (of course, GND is connected to the real shield of the cable)
SLEEVE   : MIC input

One thing I have been struggling with was the fact that the tablet wouldn't recognize something being connected to the MIC input, and would keep using the built in microphone.
So it is essential that you put a resistor on the MIC connection to the tablet !
I used 10k, another value may work for your phone/tablet ... experiment !
Other resistors are "selected in test" ... just pick whatever you need to obtain acceptable levels in & out. Remember that the KX3 has no separate DATA connector, so we're using the MIC and PHONE connectors, and the levels will depend on your MIC gain and volume settings.

Then I found a nice little case for my project, funny enough ... it is from an old phone modem for a laptop ! Size is only 7.5 x 3 x 2 cm.


The output of my interface is a female 5-pin DIN connector because I also have cables from this DIN connector to other rigs. This way I can also use the interface e.g. on a Kenwood THF7E, which also has built-in VOX. The 5-pin DIN is wired according to the "BayCom" standard (but I don't use the PTT line) :


The cable for the KX3 has a male DIN connector on one end, the other end is split in 2, one cable for the Phone output, and one cable for the Mic input on the KX3. Here the complete assembly, interface + KX3 cable :


Operating the tablet with FLDIGI is not so easy, it takes some practice if you have only the touch screen. I did my first test with a small wireless keyboard and touchpad, and it worked !


Later, I found out that you can enlarge the Macro-buttons in FLDIGI, by going to Configure > User Interface , and then on the tab Macros you will find Button Height. Put that on maximum (66) and the macros are much easier to use.

Have fun making this project, and hope to work you from one of the summits in PSK, RTTY or who knows even in SSTV ?
73 - Luc, ON7DQ

03/02/2017

IC-7300 Paddle or Key ? Easy solution with Arduino !


Instant switching between key and paddle, and setting two power levels without even touching my rig !

[EDIT: I rebuilt this project in 2023, and expanded it to use all 8 buttons in the Nintendo controller, more info and code are here]

[EDIT July 2026] New version that works with the IC-7300 Mk2, available on my github here

What's your problem ?

Since a couple of months I am the proud owner of an Icom IC-7300.
It's a wonderful rig, designed as a direct sampling SDR transceiver, with all sorts of bells and whistles, a user friendly touch screen and so much more ... for a very low price.

But that is not why I am writing this post.
The most important thing that annoyed me from the start is that the Icom designers clearly hadn't thought about the versatile CW operator.

When you are like me, and switch from paddle to straight key fairly often, you will be disappointed with this rig. On their more expensive rigs, Icom have put a straight key input on the back , and another one on the front for a paddle (labeled ELEKEY). The IC-7300 is of course a lower cost rig, but the Kenwood TS-590SG is about the same price, and it does have two keying inputs !

Now, what exactly is the problem ? You can wire a key and a paddle in parallel to the KEY input on the back, right ? Problem solved ?

NOT SO !
You still have to punch in 8 (yes EIGHT) keys on the rig (or on the touch screen), each time you want to change from paddle to key or vice versa. (For those who do not even know how to do this ... press MENU> KEYER> EDIT/SET> CW KEY SET> TYPE KEY> Select KEY or PADDLE> EXIT> HOLD M.SCOPE ... that's all, hi).
And as you can see, it's also very confusing that you have to go via the memory keyer screen, and not via the normal MENU > SETTINGS > ... as you might expect.
Also ... no programmable PF keys on this rig ...

Now, being a great Arduino fan, I thought there had to be an easy solution ...

Most Icom HF transceivers and some receivers can be controlled via the so-called CI-V bus.
The IC-7300 even has two such CI-V busses, one is incorporated into the USB connection to the PC, and there is also a "classic" CI-V connector  (3.5mm).
I have used the latter for my project , leaving the USB connection for CAT control (log program, digimode program, etc ... and for the built in soundcard of course).


CI-V bus

To understand how our Arduino project works, first a brief introduction to the CI-V bus.
I got a lot of information from Jean-Jacques, ON7EQ (see: http://www.qsl.net/on7eq/en/ , then >Projects> Arduino), and also from the "Bible of CI-V" written by Ekki, DF4OR
(see http://www.plicht.de/ekki/civ/index.html).

CI-V stands for Computer Interface 5, and is already in use with Icom transceivers since the eighties.
It is a single wire bus at TTL level, the jack is a 3.5 mm stereo plug of which only the TIP and the SHIELD are used. For control from an RS-232 port (PC) an interface is needed (eg. using a MAX232), but this is not necessary with the Arduino, since we are working at TTL level.

In the idle state, the bus is high, or "floating" (+ 5V). If the computer wants to send something, the bus is pulled low by the computer, if the transceiver sends something, it will pull the bus low.
The format of the data is NRZ (Non Return to Zero).

NRZ Format (source: Icom CI-V Manual)


Now, what do we need for this project ?
We want only to send some bytes from the "controller" (the Arduino) to the rig, and not listen to what comes back. Each message to the transceiver is composed of a fixed number of bytes, and some command bytes with or without extra data bytes (a frequency, a text, a status).

 A message always starts with twice $FE ($ or 0x is the prefix for a hexadecimal number).
Then follows the address of the transceiver, for an IC-7300 is this example $94.

After that comes the controller address, which is always $E0 (and it is never actually used in the transceiver). Now it is time for the command, if needed a sub-command, and finally the data bytes.
To conclude the message, the last byte sent is  $FD, and then the transceiver is ready to receive the next message.

There is still a small problem with the data bytes, these should not be sent in hex, because there is a chance that the data would contain a byte like $FE or $FD (the start and stop codes). Therefore, all data must be sent in BCD format. A number like 123 is then converted into $01 $23. Not difficult, but you have to think about it.

A few examples may make all this complicated stuff a little easier to understand :

Set Mode:
$FE $FE $94 $E0 $06 $00 $FD   =   put the transceiver in LSB MODE
$06 is the mode set command, $00 = LSB, $ 01 = USB etc ... you can find all the modes in the full manual of your transceiver or on the site of DF4OS.

Set USB AF / IF:
$FE $FE $94 $E0 $1A $05 $00 $59 $00 $FD:  put the USB port output (signal going to the PC) in AF mode, with $01 you set the IF mode. This again saves five keystrokes on the transceiver!

[Note : if you haven't used this feature of your 7300, it's great fun !
With the USB port in IF mode, you send 24 kHz of received signal to the PC, which can use it in any SDR program. One thing I use it for, is listening to DRM (Digital Radio Mondiale) with the DReaM software, and without using any additional hardware (converters etc)

Set Power:
$FE $FE $94 $E0 $14 $0A $00 $28 $FD:          put the TX power at 10 W
$FE $FE $94 $E0 $14 $0A $02 $55 $FD:          put the TX power at 100 W
The power is actually expressed as a percentage. The data ranges from 0 to 255, for 10 Watts you would have to send 10%, or about 255 x 0.10 = 26. In a test, I found out that 28 is nearer to 10W.
For 5W, 7% is about right, so send 255 x 0.07 = 18.

This feature saves the endless rotations with the multi-switch, it will certainly prolong it's life ...
I have included this in my project (in the extended code) ... and it uses no extra buttons! (see code).
With a long press on the KEY or PADDLE button, the power is set to 10 or 100 watts respectively.

If you have the courage to read the full manual (it's on the CD supplied with the rig), you will find more interesting commands in chapter 19.

TIP: if you want to test if a command does what you want it to do, DF4OS has written a nice Windows application: the CI-V Tester.
You can download it here: http://www.plicht.de/ekki/software/civtest.html.

The Arduino Hardware

The circuit can not be more simple:

  • an Arduino UNO, or one of the smaller variants (Nano, or Pro Mini), one diode, a resistor and two push buttons
  • a 3.5 mm jack with a shielded cable end


NOTE : Vcc means the 5V pin on an arduino board, and if you power the Arduino via the USB input, you still need to connect the 10k resistor to the 5V pin on the Arduino.

Add one more resistor if you want to read back the reply from the rig (not used in this project), put 4k7 from the TIP of the 3.5 mm connector to an interrupt capable pin (D2 or D3).

*****

Put it in a box !

Now being a very simple project,I still wanted it to be in a nice enclosure.
In my junk box I found this old Nintendo controller with two red buttons ... perfect!
Inside was a printed circuit board with an 8-bit shift register (for the 8 buttons). I removed the chip and so I had nice solder pads for every button in the box.


I'm using only the two red buttons for now, but I can easily expand the project to use the other buttons, just adding the wires and some lines of code ... that's it !
Due to the limited space in the box, I used an Arduino Pro Mini without pins, it fit just below the original PCB. The necessary wires were soldered directly to the Arduino. Some adhesive tape ensures that no short circuits occur.

Here a picture of the finished product:


Anyone building this project and put it in a nice case ? Send me a pic and I will gladly put it on this page ! (my address is on QRZ.com)

Here a detail of the assembly inside, with the two "carbon" switches


Arduino Software

If you ever programmed an Arduino , you know that an Arduino program is called a sketch.
A sketch is written in a special dialect of the C language, with the use of libraries in C++.
A sketch always consists of three parts: first the declarations, then a setup() function and finally a "loop()" function. The latter continues to run forever ... until you disconnect power.

Both the setup and the loop can call additional functions, for example in this project. the function blink() ,  which makes the built-in LED flash briefly for each press of a button.
(Not very useful in my case, since I can't see that LED, hi, but I could wire an extra LED and mount it in the top of the box)

All in all, the code is very straightforward, this is really a beginners project.
Everything should be clear from the added comments (after the // characters).

I made two versions of the sketch, a very simple one for those that only want the paddle/key switch. Then a longer one for detecting short/long press and do the power switching.

VERSION 1.0 only KEY < > PADDLE setting

// IC7300 Paddle <-> Straight Key switch
// by Luc Decroos - ON7DQ/KF0CR
// 20170105

#include <SoftwareSerial.h>  // for comms to IC7300

// IC7300 Serial comms
#define BAUD_RATE 9600       // CI-V speed

// serial connection
// RX = IC7300 to Arduino  : to pin 2 via resistor 4k7 (not used here)
//                           must be an interrupt pin
// TX = Arduino to IC7300  : direct to pin 7, with pull up 10k to Vcc (5V)
SoftwareSerial mySerial(2, 7); // (RX, TX)

int keyPin = 8;        // key button to GND
int paddlePin = 9;     // paddle button to GND
int ledPin    = 13;     // internal LED

boolean paddle = true; // start in paddle mode

void setup()
{
  // connect to IC7300
  mySerial.begin(BAUD_RATE);

  pinMode(keyPin, INPUT);
  digitalWrite(keyPin, HIGH); // turn on internal pull-up on the inputPin

  pinMode(paddlePin, INPUT);
  digitalWrite(paddlePin, HIGH); // turn on internal pull-up on the inputPin

  pinMode(ledPin, OUTPUT);
}

void loop()
{
  if ( digitalRead (keyPin) == LOW)  {
    // set rig to straight key input
    blink();
    paddle = false;
    mySerial.flush();
    mySerial.write(0xFE);  mySerial.write(0xFE);
    mySerial.write(0x94); // radio address
    mySerial.write(0xE0);  mySerial.write(0x1A); mySerial.write(0x05);
    mySerial.write(0x01);  mySerial.write(0x64); mySerial.write((byte)00);
    mySerial.write(0xFD);

  }

  if ( digitalRead (paddlePin) == LOW)  { 
    blink(); 
    // set rig to paddle input
    paddle = true;

    mySerial.flush();
    mySerial.write(0xFE);  mySerial.write(0xFE);
    mySerial.write(0x94); // radio address
    mySerial.write(0xE0);  mySerial.write(0x1A);  mySerial.write(0x05);
    mySerial.write(0x01);  mySerial.write(0x64);  mySerial.write(0x02);
    mySerial.write(0xFD);
  }
  
  digitalWrite(ledPin, paddle); // LED ON = paddle; OFF = key
  delay(100);
}

void blink() {
  digitalWrite(ledPin, HIGH);
  delay(250);
  digitalWrite(ledPin, LOW);
  delay(250);
  digitalWrite(ledPin, HIGH);
  delay(250);
  digitalWrite(ledPin, LOW);
  delay(250);
}

VERSION 2.0 with POWER setting

// IC7300 Paddle <-> Straight Key switch
// by Luc - ON7DQ/KF0CR
// 20170105 started project with only 2 functions
// 20170201 extra code for  : hold buttons sets PWR to 10W or 100W  

#include <SoftwareSerial.h>  // for comms to IC7300
#define BAUD_RATE 9600       // CI-V speed

// serial connection
// RX = IC7300 to Arduino  : to pin 2 via resistor 4k7 (not used now)
//                           must be an interrupt pin
// TX = Arduino to IC7300  : direct to pin 7, with pull up 10k to Vcc (5V)
SoftwareSerial mySerial(2, 7); // (RX, TX)

int keyPin     = 8;     // key button to GND
int paddlePin  = 9;     // paddle button to GND
int ledPin     = 13;    // internal LED
int count = 0;          // counter for press time
int longTime = 500;     // limit for short/long press
boolean paddle = true;  // start in paddle mode

void setup()
{
  // connect to IC7300
  mySerial.begin(BAUD_RATE);
  //mySerial.write(0x00); //send any initialization command if needed, not used yet

  pinMode(keyPin, INPUT);
  digitalWrite(keyPin, HIGH); // turn on internal pull-up on the inputPin
                             
  pinMode(paddlePin, INPUT);
  digitalWrite(paddlePin, HIGH); // turn on internal pull-up on the inputPin

  pinMode(ledPin, OUTPUT);
}

void loop()
{
  count = 0;
  while (digitalRead(keyPin) == LOW) {
    count++; delay(1);
  }
  if (count > 50 && count < longTime) {
    // set rig to straight key input
    blink(); 
    paddle = false;
    mySerial.flush();
    mySerial.write(0xFE); mySerial.write(0xFE); // start
    mySerial.write(0x94);                       // radio address
    mySerial.write(0xE0); 
    mySerial.write(0x1A); mySerial.write(0x05); // command    1A 05
    mySerial.write(0x01); mySerial.write(0x64); // subcommand 164 in BCD
    mySerial.write((byte)00);                   // data   
    mySerial.write(0xFD);                       // stop
  }
  if (count > longTime) {
    // set PWR to 10W
    blink(); 
    mySerial.flush();
    mySerial.write(0xFE); mySerial.write(0xFE); mySerial.write(0x94);
    mySerial.write(0xE0); mySerial.write(0x14); mySerial.write(0x0A); 
    mySerial.write((byte)00); mySerial.write(0x28); mySerial.write(0xFD);
  }

  count = 0;
  while (digitalRead(paddlePin) == LOW) {
    count++; delay(1);
  }
  if (count > 50 && count < longTime) {
    // set rig to paddle input
    paddle = true;
    mySerial.flush();
    mySerial.write(0xFE); mySerial.write(0xFE); mySerial.write(0x94);
    mySerial.write(0xE0); mySerial.write(0x1A); mySerial.write(0x05);
    mySerial.write(0x01); mySerial.write(0x64); mySerial.write(0x02);
    mySerial.write(0xFD);
  }
  if (count > longTime) {
    // set PWR to 100W
    mySerial.flush();
    mySerial.write(0xFE); mySerial.write(0xFE); mySerial.write(0x94);
    mySerial.write(0xE0); mySerial.write(0x14); mySerial.write(0x0A);
    mySerial.write(0x02); mySerial.write(0x55); mySerial.write(0xFD);
  }
  delay(100);
}

void blink() {
  digitalWrite(ledPin, HIGH); delay(250);
  digitalWrite(ledPin, LOW);  delay(250);

}


In the code you may see a strange command :  mySerial.write ((byte)00);
This differs from the other write commands, because you can not write a NULL character.
If you would put write (00) , you would get an error message.

Conclusion

Of course you can extend the hardware and software with the other commands that we discussed, it's just a matter of some extra wires, buttons and some lines of code.

The first extension that I made (setting 10W/100W) can already be seen in version 2 of the code.
I use this for quickly tuning a manual tuner or a magnetic loop, while the IC-7300 autotuner is bypassed.

Another idea I had was making this project fully "auto-sense".
If you briefly touch the paddle, the transceiver would switch to paddle input, ditto for the key.
I tried this, but there is obviously a problem. The contacts for the DITS and the STRAIGHT KEY are wired in parallel. From the first DIT that you send, the Arduino will see this for a "straight key press" and will switch back to key input mode.
Now this can be solved by connecting paddle and key through your Arduino box, and switching them with a relay, so that the Arduino only "looks" to the contact which is not "in use" (the other device is then connected to the rig).
This was soon to be a complicated thing, and I left the idea for what it was ... just an idea , hi.

Some other idea I had was interesting enough ... how about four more buttons to send the first four memories in the memory keyer ?
Well ... I didn't find any command to do this !
Apparently there are CI-V commands to program the text into the memories (I guess those are meant to be used from a contest program on the PC).

EDIT : N1MM found out that the IC-7610 had those commands, and that they also  worked on the  7300 as well , they just were not documented in the 7300 extended manual.
The command struture is as follows (from the N1MM+ help file) :
28 00 00~08 Voice TX Memory (00=Stop, 01=T1 to 08=T8)
BUT another BIG DISAPPOINTMENT : this works only for the vOICE keyer mesaages, not for the CW messages ... what a bummer!

UPDATE on this EDIT :  the commands are now also documented in the 7300 Extended manual , version 8.

In the manual there is of course a circuit to make a 4-button "keyer"box, but the software solution can send all 8 memories.

So much for now ... have a lot of Arduino and ... CW fun !

Luc - ON7DQ/KF0CR

11/10/2016

My "Dr. Frankenstein" Key for WES

Oh what a busy week this was !

On Thursday evening (Oct. 6) we just had the SKSE, and the weekend of Oct. 8-9 was coming up …
WES time again.
But at the same time I had been hunting for a special award, celebrating the passing of Miguel De
Cervantes, 400 years ago (see http://cervantes.ure.es/ ).
When your call is O N 7 "Don Quijote" you HAVE to get that award, right ?
Oct. 9 was the last day to get the three missing contacts to get my “Platinum” award, I only got to
that on the Sunday at 16:00 UTC. So my time in WES was rather limited, in the end I made only 6
QSOs, but … 4 of them were US stations.
Now for the special theme this time … From the depths of the junk box, unspeakable keys!
So between all this Cervantes hunting, I went into the garage and grabbed some wood and screws.
But what to use as contact points ?
I had a box full of old appliances in my garage, ready to bring to the container park (dumpster).
I saw a couple of broken clock radios and a desk lamp. So I cut off three power cords and went back
to the shack.
After some thinking … drilling a couple of holes … and using only three screws, I came to this result :


A view from the side shows how two of the pins of the power cord form the contacts, the power plug
from the third power cord is the key’s primitive “knob”. The lever is a wooden paint stirrer which
seems to have just the right tension, so I didn’t make an adjustment for that. However, the contact
distance was way too big, so I added a fourth screw halfway the lever to reduce the spacing to a
comfortable distance.


I then covered my DF key with an early "Halloween theme" ... scary stuff eh ?


You could call it a “dust cover” but I suspect it collects more dust than it protects … HI.

The key was used in all 6 QSOs, and worked quite well, though it feels rather “soft”.

Here the proud builder/owner … hope you like my “design” !


02/09/2016

The "Dutch SOTA" Tour - Day 3

Day 3 of my short trip meant I had to go home, and had only time for one more summit.

ON/ON-028 Waterschei, 195m, 1 point


I had done this summit the year before, so agin , I parked at the Crystal Arena, at position 51.006741, 5.537109. This is very close to the start of the track.

Last time I had done a long walk around the summit to climb it from the North.
This time I took the more direct approach from the South.
Conclusion : this summit is steep from whatever side you come !
And the slopes are a bit dangerous, it's best to carry at least one walking stick to keep you upright.


Of course, when you make it to the top, the view is the best of all Belgian summits.
You have a 360° clear view, here some of the things you'll see.


The summit itself has very limited space, still I was able to set up my full size 40m linked dipole.


Using the big block of concrete as a support for the fishing pole, and as an operating table.


I spent almost one and a half hour on the summit, and made 30 QSO's on 40m and 20m, mixing SSB and CW. This included also 3 S2S contacts.

That activation was also the end of my trip. I still had to drive 200 km to get back home.

See you on another SOTA adventure !

73,

Luc ON7DQ


01/09/2016

The "Dutch SOTA" Tour - Day 2

Day 2 and 3 of my short tour were not in PA land, but since I had the opportunity, I grabbed a few ON summits as well.

So I left Venlo in the morning and drove some 100 km to my first summit near the city of Liège.

ON/ON-029 St Barde et Tonne, 230m, 1 point

I found a good parking spot in the Rue Sergent Merx, at position 50.658567, 5.560872

The entrance to the track is just opposite this street, in the Rue Naniot. 

I made a better description in a later post, see

https://on7dq.blogspot.com/2017/04/short-sota-tour-and-dirage-ham-rally.html

I set up my link dipole along one of the many paths on the summit, which are all in the AZ.
There is no need to climb the black coaldust "bubbles" and get dirty, hi.


A good result again with 26 QSO's, including 3 S2S.

On to the next one ...

ON/ON-026 Henri-Chapelle, 354m, 2 points

A drive-up summit, with a nice parking spot at 50.677059, 5.920479, where you will also fnd a picknick table, and a bench with a nice view over the "Pays de Herve".

Of course, since it was already 13:00 local time, it was time to feed the operator.


Then, at the same bench, play some radio ... while enjoying the landscape in front.


Only 15 QSO's here and 1 S2S, but still not a bad result.

Time to move again ...
Last summit of the day ...

ON/ON-009 Iverst, 693m, 8 points

This was a new summit for me, it became only valid on April 1st 2016. At first I thought it was an April fools' joke, because in my local dialect "ieverst" means "somewhere" or "anywhere" ... hi.
But after I realized it was real, I had to activate it.

I found a nice parking spot on the Belgian side, at position 50.408334, 6.369737.


There is an information panel on the history of the Belgian-German borderline, and to the right it's only a few steps to a nice operating spot.


Again I had 15 QSO's in the log, and 1 S2S. ON7DQ happy, happy !

That concluded my second day, and I had booked an AirBnb room with a friendly lady in Eupen.
That evening was also the first Thursday of the month, so that meant it was time for the SKCC Eurosprint. So as if I hadn't done enough radio that day, I asked permission to set up on the terrace of the house where I stayed, and made another 3 QSO's in the SKSE.

Read the end of this story on Day 3 or go back to Day 1